|
LandVision™ Help > Documentation > Quick Map Exhibit
|
|
LandVision™ Commercial Edition enables you to create a polished and custom map exhibit for presentation purposes. In just a few clicks, you can present your subject site with information about the surrounding market to highlight desirable amenities such as nearby restaurants, shopping centers, access to major transportation and more.
Note: In order to view an increased number of POIs on the map, the view should be zoomed out far enough to show a larger area before selecting the Create Map Exhibit command.
|
Creating a Quick Map Exhibit
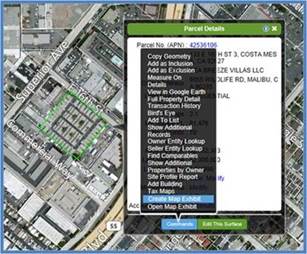
- Identify the property you’d like to create a map exhibit for by clicking on a parcel.
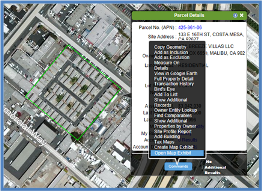
- Click on Commands at the bottom of the Parcel Details Windows.
- Click Create Map Exhibit in the menu.
|
|
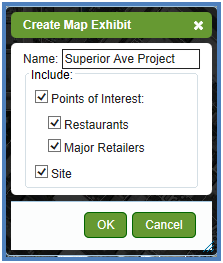
- In the Create Map Exhibit window:
- Name: Enter a name for your map exhibit.
Tip: Rename your map exhibit to the name of your subject site. This exhibit will eventually turn into a layer and will be easier to identify in your legend for future reference.
- Include: Determine the features you’d like to include in your map exhibit:
- Points of Interest: LandVision™ provides a wide variety of POI for your map exhibit. If a POI, such as Starbucks, is near your identified property, you can display its icon on the map.
To view or modify the default POI for your map exhibit, click the Modify link next to Points of Interest. A window appears with two types of POI, Food and Retail. The icons of checked POI appear on the map.
- Site: Outlines the site and enables you to control the look of the site using Drawing Tools.
|
|
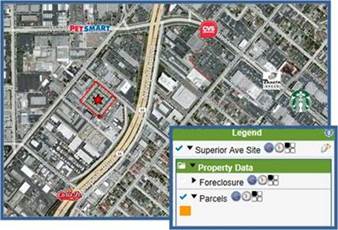
- Click OK. Your map exhibit is created:
- An icon identifies your site.
- The property boundary is outlined.
- A layer is created in the Legend for your map exhibit.
|
|
Modifying a Quick Map Exhibit
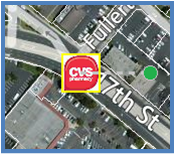
- To modify the icons on your quick map exhibit, click on any icon in your map view.
- The Drawing Toolbar appears at the bottom of the map screen once the icon is active.
Note: You can rotate a selected icon by clicking on the green point at the end of the dashed line, and while holding the mouse down turning it to your desired location.
|
|
- Click OK in the Drawing Toolbar to accept your selections. The Drawing Toolbar closes and the icon is de-selected.
Tip: There are many options to customize your map exhibit. Your map exhibit is created as the target layer. The target layer is the active layer that drawings are added to. You can draw shapes and lines, and place icons, labels, and overlays on your map exhibit using the Drawing Tools in LandVision™ (See Related Documents for more information).
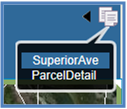
Note: When you click on your map exhibit, the Notification icon  may display at the top right corner of LandVision™. Click the Notification icon to open a menu that lists the identified layers where you clicked. Select the layer you’d like to work on by clicking on it. In the example to the right, SuperiorAve and ParcelDetail are the listed identified layers. may display at the top right corner of LandVision™. Click the Notification icon to open a menu that lists the identified layers where you clicked. Select the layer you’d like to work on by clicking on it. In the example to the right, SuperiorAve and ParcelDetail are the listed identified layers.
|

|
Opening a Quick Map Exhibit
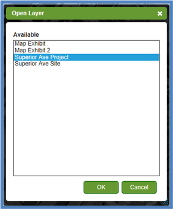
- To open a map exhibit, select the parcel that the map exhibit was created on.
- In the Open Layer window, select the map exhibit you wish to view. Click OK. Your map exhibit will appear.
|
|
Related Information
|